Except to be a poet or romantic writer drawing inspiration from their torments, hard for me ordinary mortals whose main thoughts are occupied with the cares of everyday life to find the enthusiasm necessary to write to tell and new recipes to share.
Added to this a long waltz hesitation in choosing the first recipe of the year on the blog - choice complicated by extending a list of drafts of bills to be published - it would have taken much for coming in January to a close without any new recipe to put in their mouths!
And in this "emergency" that bread has become obvious ...
because in spite of circumstances and despite wishes Happy New Year with a bang chocolate and caramel delirium, the bread is always my first passion
because the bread is also a return to core values
because the bread in its simplicity has a reassuring and comforting
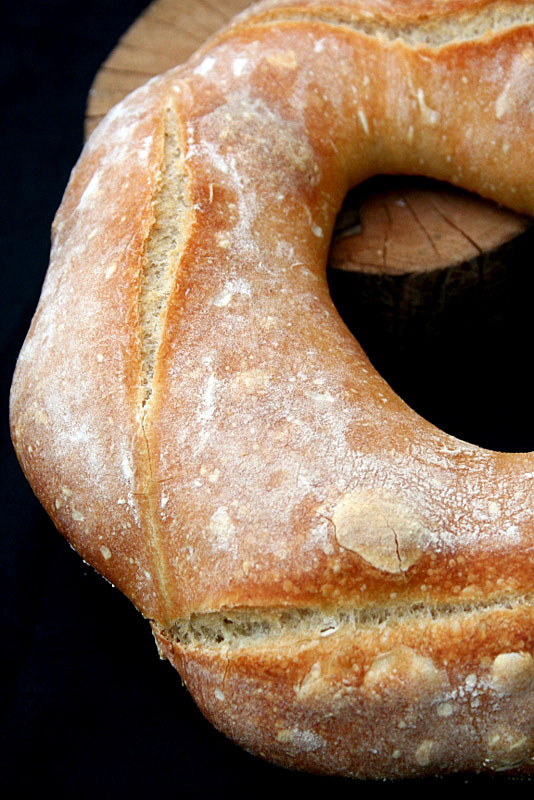
because the bread is loaded with symbols and I particularly like this one shaped like a crown to mark a new cycle Life, the spinning wheel ..
However, nothing prevents you from change shape: baguette, spike Auvergne, miche ... This rustic bread is a "good sort", it will bend all your fantasies and even let her eat until last crumb ..
This bread goes to Susan and Her wonderful bread gallery, Yeastspotting !
(average for 2 crowns)
for fermented dough
- 300g flour T65
- 1 / 2 tsp instant dry yeast 5g salt
- 180 to 200ml warm water
for pulp
- 480g of fermented dough 240g flour
- T65
- 50g wholemeal T110 or T150 or T130
- rye 1 tsp instant dry yeast
- 1 teaspoon salt
- 180 to 200ml warm water or warm
Preparation fermented dough (the day)
In a large bowl, mix the flour with the yeast and then add the salt and water.
Mix with a wooden spoon until it forms a coarse paste heterogeneous. Adjust with flour (if dough seems too sticky) or water (if remaining flour unbundled) and transfer to a lightly floured work plan.
Knead dough for 5 to 10 minutes or the time it becomes smooth, supple and elastic (dough should be slightly sticky to the touch, what I call effect scotch).
Place dough ball in a lightly oiled bowl and turn in all directions so that its entire surface is covered with a thin film of oil. Cover with plastic wrap and let rise about 1 hour (the dough should have reached 1 1 / 2 times its original volume). Work the dough briefly
(directly into the bowl) for degassing and then cover again and refrigerate overnight.
Note: The fermented dough can be kept refrigerated 3 days or frozen 3 months closed tightly in a freezer bag. You can if you're in a hurry to use the fermented dough the same day after leaving 2 hours instead of pushing it 1h will have less flavor.
For the final dough
Nightlife fermented dough from the refrigerator 1 hour before you start, cut into 10 pieces with pastry blender or a sharp knife and cover with a cloth to prevent dough crust and dry.
In a large bowl, mix the flour and dry yeast and then add salt, stir and dig a well. Pour lukewarm water (start with 180ml), add the dough pieces Fermented and coarsely crush with your fingers (or a wooden spoon) to dissolve.
Mix with a wooden spoon from the center and expanding the movement to break down and incorporate the flour from the edges until a "ball" of dough heterogeneous (add the rest of water remaining flour if unincorporated).
The dough at this stage should be rather soft and supple.
Transfer the dough on a work plan lightly floured surface and work hard to start until the dough begins to soften and then homogenized and knead for ten minutes or the time required for it to pass the windowpane test and it is slightly sticky to the touch.
Note: personally, I have long been used for pasta hydrated to work directly in the bowl by stretching the dough up and then letting it all fall by folding in on itself. While waiting one day Perhaps a video of my method of working the dough, I put here the more traditional method of kneading a map
work.
Place dough in oiled bowl in a ball in the back for cover the entire surface. Cover with plastic wrap and let stand for 2 hours (dough should double in volume).
Note: in summer or in a particularly hot, the dough is double in size in less than 2h. In this case, we must de-gas a little kneading it a few seconds then back to the time needed to push it doubles in volume
Transfer the dough very gently on a plan lightly floured work, taking care to de-gas the least possible (for this start off by the edges of the dough bowl with a horn or a spatula if before reversing it on the countertop. This operation allows the dough to take off without the rush and avoid tearing the gluten network) .
Divide with pastry into 2 pieces of approximately equal volume.
Note: I usually advise to always have to weigh the same weight of dough pieces mainly for even cooking. Here it is preferable to minimize handling of the dough in order to preserve its structure. Moreover, the crowns being cooked on separate plates (unless you have a very large oven), the volume difference is irrelevant since the firings will also separately
Prepare 2 baking sheets by lining with paper sprinkled with cornmeal (or corn).
Shape each piece into a tight ball regularly and properly closed at the level of the key. Cover with a clean cloth and allow to relax for ten minutes.
Shape each piece into a tight ball regularly and properly closed at the level of the key. Cover with a clean cloth and allow to relax for ten minutes.
Roll each ball in a ring by digging a hole in the center with fingers or floured elbow choice then enlarging excessively (middle hole minimum diameter 10 cm) by turning gently the dough in the hands either air either directly on the countertop. Oiled with the handle of a long wooden spoon, press firmly on the 4 quadrants of the ring to form "slots" and then flour through a strainer to prevent the cracks from closing during cooking.

(Photo credit: Nicole Emmert Hamaker - Pinch My Salt )
Submit crowns directly on the baking sheets prepared by depositing into the hole in the crown a floured bowl (to avoid that the hole closes over the primer) is turned face down fishing baskets in a crown professional or homemade well floured. If the crowns are to be cooked on a stone type pizza stone, place on a baking reversed (bottom top) filled with a sheet of baking paper sprinkled with semolina.
Cover with oiled plastic wrap (for crowns plate) or a clean cloth (fishing baskets) and let rise about 1 hour or while crowns have reached 1 1 / 2 times its original size.
Prepare the oven for baking about 20 minutes before the end of the primer (final lift): Put a metal baking dish Put on the grid at the lowest level of oven and preheat the oven thermostat. 8-9 (240 ° C).
Note: If you have a baking stone (pizza stone or brick) Place in oven at the beginning of preheating
In the wreaths were laid directly on a baking sheet (normal or flipped) or a fishing baskets, bake them respectively such that, by dragging them with the baking paper support on the pizza stone or turning over a shovel (if a baking sheet returned) dusted with semolina.
Quickly pour a glass of hot water in the flat metal and then spray the walls and the loaves with water mist. Close immediately , count 30 seconds and open the oven again to spray water on the oven walls. Close down the thermostat at 7-8 (230 ° C) and bake for 10 minutes. Turn the baking sheet or directly bread 180 ° C for even cooking and cook for 10 to 12 min. The loaves should be golden brown caramel and sound hollow when tapped underneath.
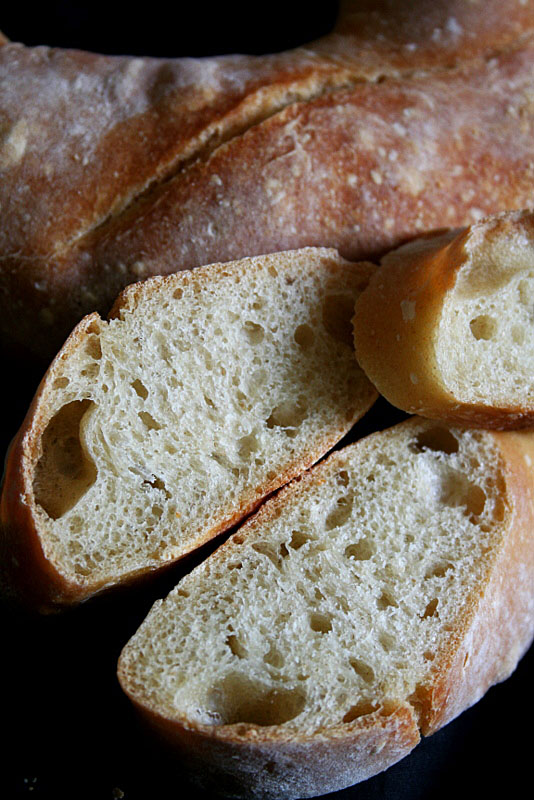
Cool on rack for at least 40 minutes before slicing and devour.
Source: Adapted from The Bread Baker's Apprentice: Mastering the Art of Extraordinary Bread


